A stuck fastener at the exhaust port can turn a simple gasket job into a machine shop bill if you treat it like a strength contest. Good exhaust bolt removal is less about muscle and more about control: heat, timing, feel, and knowing when the head is already in danger. The first goal is not to make the bolt move. The first goal is to avoid snapping it flush with the aluminum or cast-iron surface. That is the moment the job changes. You move from repair to recovery.
Most American DIY owners meet this problem on older pickups, Jeeps, Subarus, Hondas, Fords, and high-mileage work vans that have lived through salt, heat cycles, and years of short trips. Exhaust hardware sits in a harsh place. It gets soaked, cooked, cooled, and shocked. That is why clear documentation matters, whether you are following a factory manual, a shop note, or clear automotive repair guidance before turning a wrench. The smart move is slow, almost boring. Clean first. Heat second. Try movement in tiny steps. Save drilling for the moment when the fastener gives you no other honest choice.
Exhaust Bolt Removal Starts With Reading the Fastener
The fastener tells you more than most people notice. A rounded head, a dark rust ring, a shiny stretched shank, or a missing washer can change the whole plan. You are not removing a normal bolt anymore. You are reading a small failure point buried beside a heat-cycled casting.
A good first pass feels almost like inspection work. That is the part many driveway repairs skip. The wrench goes on too soon, the bolt squeals once, and the owner thinks it is moving. Then it snaps. Slow prep is not caution for its own sake. It is the cheapest insurance you have.
Why an exhaust manifold bolt freezes in place
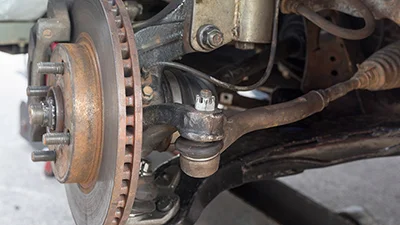
An exhaust manifold bolt often locks up because two different problems stack together. Rust attacks the exposed threads and washer area, while heat cycling grips the threaded section deeper in the head. On older engines, that heat cycle repeats thousands of times. The bolt expands, contracts, and slowly loses the clean thread fit it had when new.
Add road salt and the situation gets worse. A 2008 Silverado from Michigan or a Tacoma that spent winters in Vermont may look normal from above, but the manifold hardware can be swollen under the flange. The head of the bolt may be smaller than it used to be. The socket can feel correct at first, then slip as soon as torque rises.
The non-obvious point is this: the rust you see may not be the part holding the bolt. The exposed section can look ugly while the real grip sits inside the first few threads of the head. That is why grinding the outside clean helps, but it does not solve the whole job. You still need a plan for what is hidden.
Clean, mark, and test before force enters the job
Start with a wire brush, pick, scraper, and brake cleaner. Clean the bolt head, flange pocket, and the few exposed threads you can reach. Tap the head of the bolt with a small hammer, not to flatten it, but to shock the rust crust and help oil creep into gaps. A six-point socket matters here. A twelve-point socket on a rusted fastener is how good jobs become bad stories.
Mark the bolt head with paint pen or a scribe line before the first real try. That small mark tells you whether the bolt moved or whether the socket slipped. This matters because rust can fake movement. You feel a shift, your hope jumps, and then you see the mark has not moved at all.
Use gentle tightening pressure before loosening. A tiny motion inward can crack corrosion where outward force would twist the shank. Do not lean on a long breaker bar early. Short, controlled pressure gives better feedback. If the bolt springs back, squeaks sharply, or feels like a wet branch twisting, stop. That feel often comes before a break.
Heat, Penetrant, and Shock Work Best in the Right Order
Once inspection says the bolt is worth saving, the job becomes a sequence. Penetrant without clean metal wastes time. Heat without a fire plan is reckless. Hammer shock without the right socket can round the head. Each tool works, but only when used in the right order.
The rhythm is simple: clean, oil, wait, shock, heat, test, repeat. That sounds slow. It is faster than drilling beside a valve cover with your hands shaking.
Penetrating oil needs clean metal and time
Penetrating oil does not melt rust like magic. It creeps through small gaps. That means it needs access. Spray after cleaning, then tap the bolt head and flange area so vibration helps the oil travel. On a vertical manifold, spray above the flange and let gravity help. On a lower exhaust flange, spray from both sides if you can reach.
Give the oil time. A rushed five-minute soak may help on a mild case, but a car from Ohio with 180,000 miles may need several rounds over a day. If the car is still drivable and the leak is not sending fumes into the cabin, soaking the hardware the night before can change the job. Keep the area clear of oil before applying flame later.
This is where many owners overdo it. They spray more and more, thinking volume is the answer. It usually is not. A small amount placed well, followed by tapping and time, often beats a soaked mess that turns into smoke when heat arrives.
Heat the surrounding metal, not your temper
Heat works because metals expand. When you heat the area around the bolt, the threaded hole can grow a touch and break the bond. The target is control. You are not trying to make the whole engine bay glow. You are trying to put heat where the grip lives.
Use a heat shield, keep a spray bottle or extinguisher nearby, and stay away from fuel lines, plastic loom, oil residue, and dry leaves under the car. Many modern engine bays pack wiring and hoses near the exhaust side. A small torch can still do damage if the flame points at the wrong thing. A heat gun may be safer near sensitive parts, though it may not be strong enough for heavy corrosion.
After heating, let the fastener cool a little, then try a small back-and-forth motion. Do not demand a full turn. Move it a hair loose, then a hair tight. Add penetrant after the metal is no longer hot enough to ignite it. That hot-cold cycle can draw oil into the threads. The win is not dramatic. It is a slow increase in movement until the bolt begins to walk out.
When the Head Is at Risk, Stop Trying to Win Fast
There is a moment when the repair changes character. The bolt head rounds. The shank twists. The stud breaks above the surface. The danger is no longer the stuck fastener. The danger is your next move.
This is where patience starts to look like skill. A head can survive a broken bolt. It may not survive off-center drilling, a snapped extractor, or a thread repair done at the wrong angle. If you are already angry, step away. Hot metal and frustration make poor partners.
Protecting cylinder head threads during drilling
Cylinder head threads are the part you are trying to save, not the part you fix after every mistake. If the bolt breaks flush or below the surface, your first job is to find true center. File or grind the broken face flat if you can. Use a center punch. Then start with a small left-hand drill bit at low speed.
Left-hand bits are worth using because they cut while turning in the loosening direction. Sometimes the heat and bite from drilling will walk the broken piece out. When that happens, it feels like luck. It is not luck. It is the result of staying centered, using sharp bits, and keeping pressure steady.
Use a drill guide when access allows. A simple bushing or guide plate can keep the bit square to the surface. Without one, it is easy to angle into the softer head material, especially on aluminum. Once the hole wanders, the repair gets ugly. You may still save it, but now you are chasing a mistake rather than removing a fastener.
When a broken bolt extractor helps and when it hurts
A broken bolt extractor can save a job when the drilled hole is centered and the remaining fastener is not welded in place by corrosion. The tool bites into the pilot hole and turns the broken piece out. In the right case, it is neat and satisfying.
The wrong case is more common. If the bolt is frozen hard enough to break its own head, a tapered extractor can expand the remaining shell as it bites. That can make the threads grip tighter. Worse, extractors are hard. If one snaps inside the bolt, normal drill bits will skate over it. Now the job may need carbide tooling, welding, or a machine shop.
Use the smallest force that gives feedback. If the extractor twists and the bolt does not move, stop. Do not add a cheater pipe. At that point, welding a nut to the broken stub may be safer if enough metal remains. The weld adds heat directly to the fastener, gives you a fresh hex, and avoids chewing into the head. For many shops, that is the cleanest rescue.
Repair Choices After the Fastener Is Out
Getting the old piece out is not the finish line. The threads, gasket surface, flange, and hardware all decide whether the repair lasts. Many leaks return because the owner celebrates too early, throws in a new bolt, and misses the damaged seat that caused uneven clamping.
Think of this stage as closing the loop. The old bolt failed for a reason. If you do not correct that reason, the next owner may be you again six months later.
Chase, repair, or insert damaged threads
Once the fastener is out, inspect the hole with a light. If the threads look dirty but intact, use a thread chaser, not a cutting tap unless the threads need new shape. A chaser cleans without removing extra material. That matters on aluminum heads, where every bit of thread engagement helps.
If the hole is stripped or cross-cut, a thread insert may be the correct fix. This is not a shameful repair. A properly installed insert can hold better than tired original threads. The trick is alignment. The insert must sit square to the manifold flange so the bolt clamps evenly. Crooked thread repair can create a leak even when the bolt feels tight.
You should also inspect the manifold ear and gasket surface. A warped manifold can pull one fastener harder than the rest. A cracked ear can make torque readings lie. On some engines, the fix is not a stronger bolt. It is resurfacing or replacing the manifold so the clamp load spreads evenly.
Reassemble so the next repair is easier
Use the correct grade, length, and style of hardware. Do not grab a random bolt from a coffee can because it fits the hole. Exhaust hardware deals with heat, vibration, and corrosion. A bolt that is too long can bottom out before clamping. A bolt that is too short can tear the first few threads.
Apply the manufacturer-approved anti-seize only where allowed, and use it lightly. Too much can affect torque feel and make a mess near oxygen sensors. Some service procedures call for dry threads or coated hardware, so check before assuming. Tighten in the proper order and in stages when the manifold uses several fasteners.
After reassembly, listen during cold start. A sharp tick near the manifold often points to a leak. Do not ignore cabin odor, either. The EPA’s carbon monoxide guidance is a good reminder that exhaust gases are not only noisy or annoying. They can be dangerous in enclosed spaces. For related work, see diagnosing exhaust leaks before they spread and repairing stripped engine fasteners before the next repair forces your hand.
Conclusion
A frozen exhaust fastener is a small part with a large bill hiding behind it. The best repair does not begin with the biggest wrench. It begins with cleaning, reading the metal, and choosing pressure that still lets you feel what is happening.
Good exhaust bolt removal rewards restraint because the head is worth more than the bolt. Heat, penetrant, shock, left-hand bits, welding, and inserts all have a place, but none of them should be used out of sequence. The smartest techs are not the ones who never break hardware. They are the ones who notice the warning signs before the break becomes expensive.
Treat the job as controlled recovery, not a fight. If the bolt moves, work it back and forth. If it twists, stop. If drilling starts, protect the center line like it is the whole repair. That mindset keeps the head alive and turns a miserable job into one you can finish with confidence. Take your time, and let the fastener lose before the engine does.
Frequently Asked Questions
How do I know a stuck exhaust bolt is about to snap?
A twisting feel, sharp squeak, or springy rebound usually means the shank is stretching instead of turning. Stop before it breaks. Clean the area, add heat and penetrant, then try tiny back-and-forth movement rather than steady force.
Is heat safe to use near an exhaust manifold?
It can be safe when controlled, but the area must be checked first. Keep flame away from fuel lines, wiring, oil residue, plastic parts, and insulation. Use shields where needed, and keep fire safety gear nearby before heating any exhaust hardware.
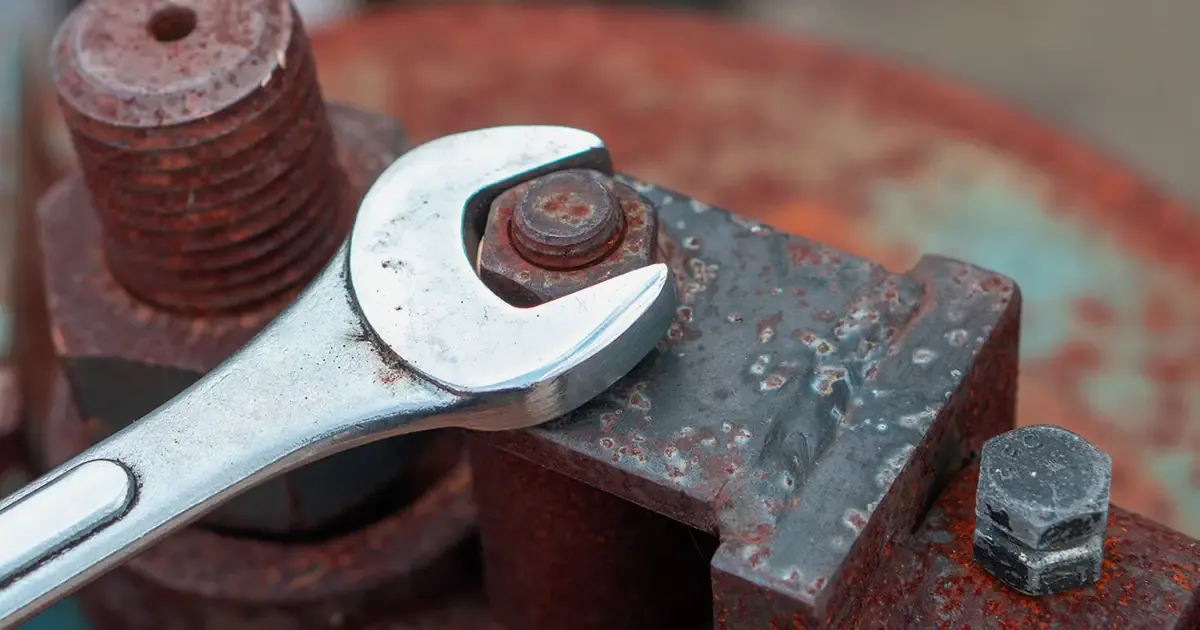
What is the best socket for rusted exhaust hardware?
A six-point impact socket gives the best grip on worn bolt heads. It contacts the flats better than a twelve-point socket and reduces rounding. The socket must fit tight. If it rocks on the head, stop and clean or size down carefully.
Should I use an impact wrench on a frozen exhaust bolt?
Short, low-power pulses can help shock corrosion loose, but full-force hammering can snap the bolt. Use an impact only after cleaning, oiling, and testing by hand. If the bolt starts to twist instead of rotate, stop using impact force.
Can penetrating oil remove a fully seized bolt by itself?
Usually no. It helps when it can reach the threads, but heavy corrosion and heat-bonded hardware need more than spray. Clean access, tapping, soak time, heat cycles, and careful movement work together. Oil alone is rarely enough on old exhaust parts.
What happens if I drill off-center into the head?
Off-center drilling can damage the threaded hole, cut into the head material, or force a crooked thread repair. That can cause poor clamping and repeat leaks. Use a center punch, sharp left-hand bits, and a drill guide when space allows.
Are thread inserts reliable for exhaust manifold repairs?
Yes, when installed square and to the proper depth. A thread insert can restore clamping strength in a stripped hole. The key is alignment with the manifold flange. A crooked insert may hold torque but still allow an exhaust leak.
When should I take the job to a machine shop?
Go to a shop when the bolt breaks below the surface, an extractor snaps, access is poor, or drilling has already wandered. Paying for expert removal is cheaper than replacing a damaged head. Early help often saves both time and money.