

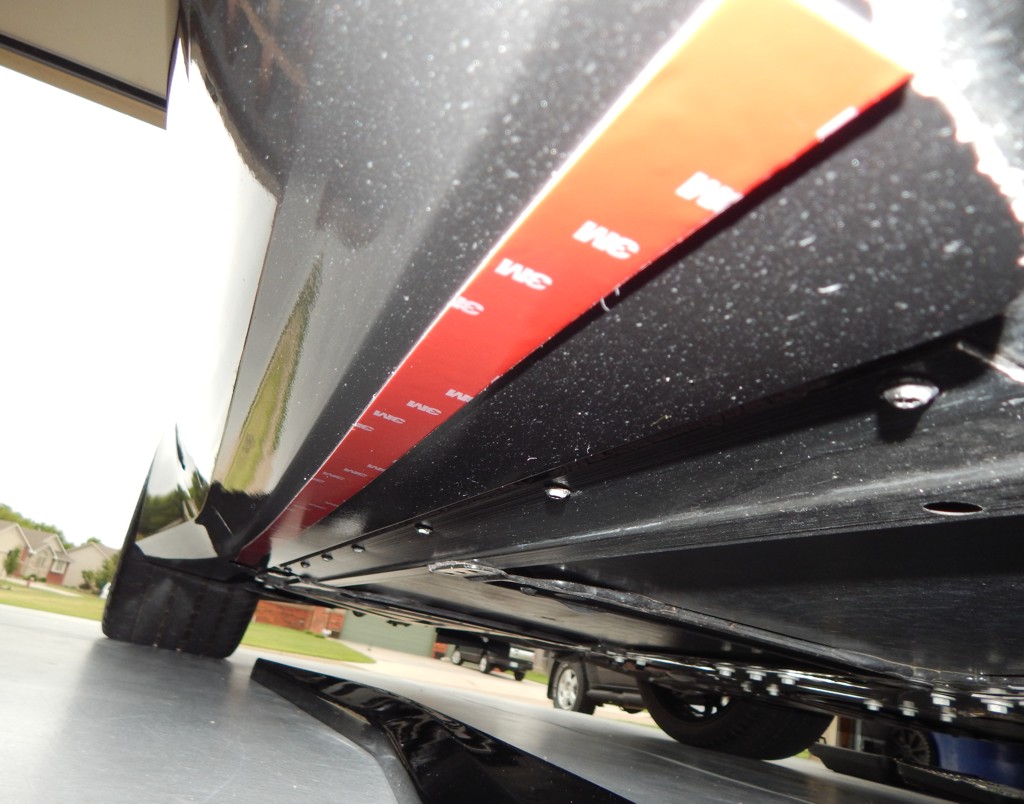
Side skirts can change the visual profile of a vehicle by emphasizing the lower body line and creating a more connected appearance between the front and rear sections. They are popular in both subtle styling projects and more aggressive custom builds.
Despite their relatively simple appearance, side skirts need to be fitted carefully. They are close to the road and may be exposed to water, dirt, stones, vibration, and accidental contact with uneven surfaces.
Understanding Side Skirt Designs
Side skirts are available in different shapes and mounting styles. Some replace factory components, while others attach over or beneath existing trim. Extensions may also be supplied as part of a larger aerodynamic package.
The correct design depends on the vehicle’s body shape, ground clearance, and intended use.
Choosing a Suitable Style
A subtle skirt may follow the original rocker panel closely, while a more aggressive design extends farther outward or downward.
Before purchasing, consider the vehicle’s existing front and rear styling. A side skirt should complement these elements rather than create a disconnected line along the body.
Also evaluate how low the component will sit. An attractive design may be impractical if it frequently contacts speed bumps, driveway entrances, or rough road surfaces.
Confirming Vehicle Compatibility
Side skirt mounting points vary between vehicle models and generations. Even different trim levels may have distinct rocker panel shapes or factory attachments.
Check the exact make, model, year, and trim before ordering. Ask the supplier whether the product replaces the original skirt or attaches to an existing panel.
Check the Included Hardware
Some products include mounting carbon fiber side skirts install brackets, screws, clips, or templates, while others require additional hardware.
Confirm what is included before installation begins. Using unsuitable fasteners or improvised mounting points can lead to poor alignment and unreliable attachment.
If the vehicle has already been modified, verify that the new skirts are compatible with the existing components.
Choosing the Right Material
Side skirts may be made from ABS plastic, polyurethane, fiberglass, or carbon fiber composites.
ABS plastic is commonly used for molded exterior parts. Polyurethane can provide flexibility in certain applications. Fiberglass can support custom shapes but may require additional preparation. Carbon fiber composites are often chosen for their appearance and potential weight benefits.
Evaluate Durability for Daily Use
The lower body of a vehicle is exposed to road debris and occasional contact with obstacles. Material suitability depends on the component’s thickness, design, mounting arrangement, and intended use.
A rigid component that works well on a show vehicle may be less practical for a daily driver on uneven roads. Ask the supplier about the product’s expected use and maintenance requirements.
Preparing the Vehicle
Before installation, read the manufacturer’s instructions and inspect the supplied parts for damage or missing hardware.
Clean the mounting surfaces thoroughly. Dirt, grease, old adhesive, and moisture may interfere with attachment or cause alignment problems.
Inspect Existing Panels
Check the factory side skirts or rocker panels for cracks, corrosion, loose clips, and previous repairs. Damaged mounting points should be addressed before fitting the new components.
If the product requires removal of existing trim, follow the vehicle-specific procedure to avoid breaking clips or scratching painted surfaces.
Test-Fitting the Components
Position the side skirts before applying adhesive or drilling any holes, where the installation method permits.
Check alignment along the entire length and compare the front and rear transitions. Make sure the components do not interfere with doors, wheel openings, or other moving parts.
Marking Mounting Points
Use the manufacturer’s templates and measurements when provided. Confirm the position on both sides of the vehicle before making permanent changes.
Before drilling, identify what lies behind the mounting area. Wiring, structural elements, and other equipment may be hidden behind body panels.
Do not force the part into position if mounting points fail to align. Incorrect fitment may indicate that the component is designed for another vehicle configuration.
Choosing the Correct Attachment Method
Side skirts can use mechanical fasteners, brackets, adhesive, or a combination of these methods. The correct approach depends on the design and manufacturer’s instructions.
Mechanical Fasteners
Fasteners should be appropriate for the mounting surface and installed in the specified locations. Tightening requirements matter because excessive force can damage plastic or composite materials.
If drilling exposes bare metal, suitable corrosion protection may be necessary. Avoid substituting random fasteners for the hardware specified by the manufacturer.
Adhesive Systems
Adhesive attachment requires compatible products and careful surface preparation. Follow the instructions for cleaning, application, temperature, and curing time.
Do not assume that the component is ready for driving immediately after installation. Some adhesives need time to reach their intended bond strength.
If the product requires mechanical fasteners as well as adhesive, do not omit them without the manufacturer’s approval.
Installation Alignment and Finishing
A professional-looking result depends on consistent positioning and clean transitions. Uneven gaps, visible excess adhesive, or exposed hardware can make the installation appear unfinished.
Check the component from several angles before final tightening or allowing adhesive to cure. If painting is required, test fit the parts before final finishing whenever possible.
For complex installations, a body shop can assist with adjustment, surface preparation, and paint matching.
Checking Clearance and Safety
After installation, verify that the skirts do not contact tires or interfere with doors and other moving parts.
Consider the vehicle’s normal driving environment. Steep ramps, uneven surfaces, and speed bumps may present a risk to low-mounted components.
Check the attachment points carefully and follow any manufacturer guidance about when the vehicle can be driven. If a skirt moves or appears loose, correct the issue before using the vehicle.
Long-Term Maintenance
Side skirts collect dirt and moisture, so regular cleaning helps preserve their finish. Use suitable automotive products and avoid abrasive materials that may scratch painted or composite surfaces.
Inspect the lower edges and mounting points periodically for cracks, loose fasteners, lifting adhesive, or impact damage.
Address small problems early. A loose skirt may be damaged further by road vibration or airflow, increasing repair costs.
Frequently Asked Questions
1. Can side skirts be installed at home?
Some kits are suitable for experienced DIY installers, but the difficulty depends on the attachment method and vehicle. Drilling, bodywork, and complex alignment may require professional help.
2. Should side skirts be painted before installation?
Test-fitting first is usually advisable when the installation method permits it. This helps identify alignment problems before the final finish is applied.
3. Can side skirts affect ground clearance?
Yes. Components that extend downward may reduce clearance and become vulnerable to road obstacles. Check the installed height and consider the conditions in which the vehicle will be driven.
Conclusion
Side skirt installation requires careful preparation, correct fitment, secure attachment, and attention to ground clearance. By choosing a compatible design, following the manufacturer’s instructions, and checking the components after installation, owners can achieve a cleaner exterior profile while reducing the risk of loose parts or avoidable damage. Proper maintenance helps preserve the appearance and durability of the finished build.